A GridLayout in Android places individual components in columns and rows just like a table. Let us know more about Android GridLayout that aligns columns with equal widths using Android Studio. Finally, the layout becomes Auto-Fit Grid-Layout.
Learn Java basics before diving into Android for fast coding and development.
Android GridLayout with Equal Width Columns
A GridLayout (Grid Layout) is good if you are developing Calculator-Buttons type screen. The problem with the default Android GridLayout is that the elements do not take full width available. So the auto-expanding or shrinking of components according to the width of the screen does not happen. This spoils the user experience or impression.
Two main properties the GridLayout to be set here are the Column Count and Orientation.
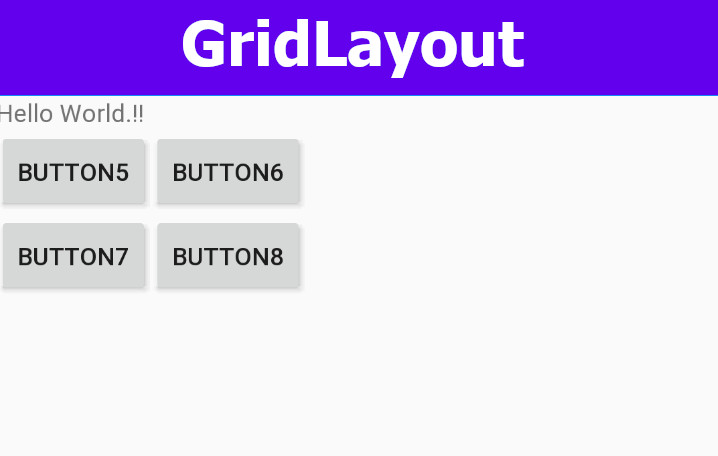
First, we shall see how the normal GridLayout looks like the using default XML code. We try to place components directly under a GridLayout parent element. We placed buttons here inside the layout. These buttons do not expand up to the screen width.
content_main.xml File
<?xml version="1.0" encoding="utf-8"?>
<LinearLayout xmlns:android="http://schemas.android.com/apk/res/android"
    xmlns:app="http://schemas.android.com/apk/res-auto"
    xmlns:tools="http://schemas.android.com/tools"
    android:layout_width="match_parent"
    android:layout_height="match_parent"
    android:id="@+id/mainScreen"
    android:orientation="vertical"
    >


            <TextView
                android:layout_width="match_parent"
                android:layout_height="wrap_content"
                android:text="Hello World.!!"/>

            <GridLayout
                android:id="@+id/GridLayout1"
                android:layout_width="match_parent"
                android:layout_height="wrap_content"
                android:columnCount="2"
                android:orientation="horizontal">
                <Button
                    android:id="@+id/button5"
                    android:layout_width="wrap_content"
                    android:layout_height="wrap_content"
                    android:text="Button5" />

                <Button
                    android:id="@+id/button6"
                    android:layout_width="wrap_content"
                    android:layout_height="wrap_content"
                    android:text="Button6" />
                <Button
                    android:id="@+id/button7"
                    android:layout_width="wrap_content"
                    android:layout_height="wrap_content"
                    android:text="Button7" />
                <Button
                    android:id="@+id/button8"
                    android:layout_width="wrap_content"
                    android:layout_height="wrap_content"
                    android:text="Button8" />

            </GridLayout>

</LinearLayout>
The output of the above Layout looks like this.

Now, we shall make some changes to the GridLayout elements or components so that those take equal-width columns.
Follow the below steps to make the elements take full available width of the screen.
- Add a LinearLayout enclosing each element of the GridLayout
- Making the width of the LinearLayout to "0dp".
- Setting the width of the inner element to "match_parent"
content_main.xml File
<?xml version="1.0" encoding="utf-8"?>
<LinearLayout xmlns:android="http://schemas.android.com/apk/res/android"
    xmlns:app="http://schemas.android.com/apk/res-auto"
    xmlns:tools="http://schemas.android.com/tools"
    android:layout_width="match_parent"
    android:layout_height="match_parent"
    android:id="@+id/mainScreen"
    android:orientation="vertical"
    >


            <TextView
                android:layout_width="match_parent"
                android:layout_height="wrap_content"
                android:text="Hello World.!!"/>

            <GridLayout
                android:id="@+id/GridLayout1"
                android:layout_width="match_parent"
                android:layout_height="wrap_content"
                android:columnCount="2"
                android:orientation="horizontal">

                <LinearLayout
                    android:layout_width="0dp"
                    android:layout_height="match_parent"
                    android:layout_columnWeight="1">
                    <Button
                        android:id="@+id/button1"
                        android:layout_width="match_parent"
                        android:layout_height="wrap_content"
                        android:text="Button1" />
                </LinearLayout>

                <LinearLayout
                    android:layout_width="0dp"
                    android:layout_height="match_parent"
                    android:layout_columnWeight="1">
                    <Button
                        android:id="@+id/button2"
                        android:layout_height="wrap_content"
                        android:layout_width="match_parent"
                        android:text="Button2" />
                </LinearLayout>

                <LinearLayout
                    android:layout_width="0dp"
                    android:layout_height="match_parent"
                    android:layout_columnWeight="1">
                    <Button
                        android:id="@+id/button3"
                        android:layout_width="match_parent"
                        android:layout_height="wrap_content"
                        android:text="Button1" />
                </LinearLayout>

                <LinearLayout
                    android:layout_width="0dp"
                    android:layout_height="match_parent"
                    android:layout_columnWeight="1">
                    <Button
                        android:id="@+id/button4"
                        android:layout_height="wrap_content"
                        android:layout_width="match_parent"
                        android:text="Button2" />
                </LinearLayout>

            </GridLayout>


</LinearLayout>
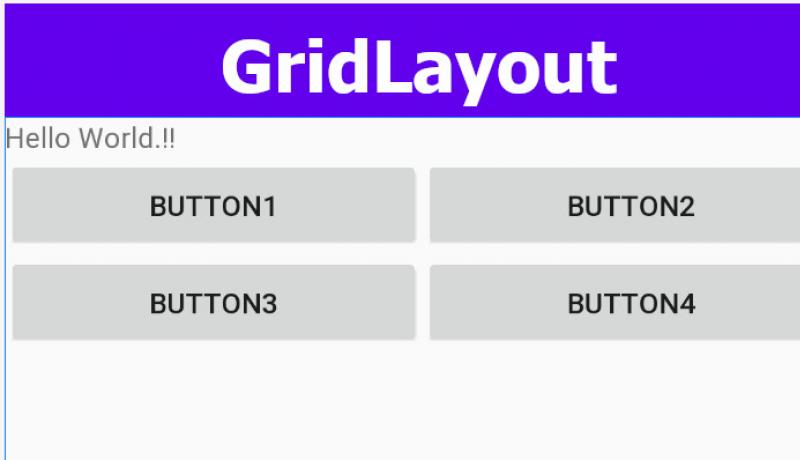
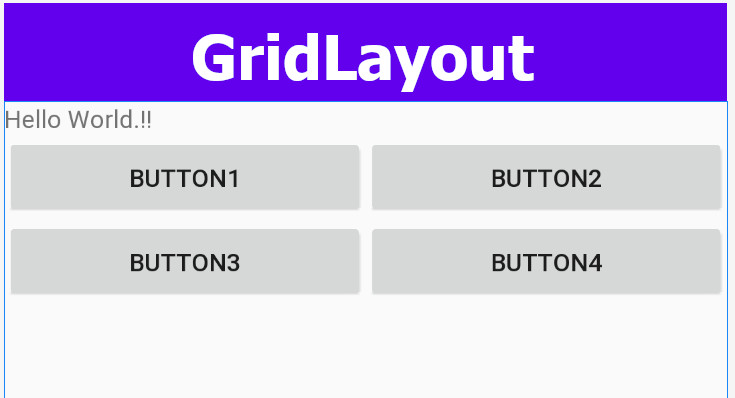
The output of the XML looks like the below infographic.

This is how we can easily make the elements of the Android GridLayout to expand or shrink to match the screen width automatically.
It is time to share this android studio code sample with your friends and colleagues.
