Microsoft has started rolling out Windows 11 to users who have enrolled on its Insider Program. Most of the new generation Desktops and Laptops are eligible to run Windows 11 while many of the older PCs have been left out. Let us know how to Download and Install Windows 11 Operating System.
You need to enrol in Windows Insider Program first to receive Windows 11 update. Also, note that your PC should be running Windows 10.
Note: Windows 11 is officially out now. You can download and create installation media if required.
How to Download and Install Windows 11 Operating System
As of now only Preview Builds of Windows-11 are available. All the Windows 10 users can check whether Windows 11 update is showing up or not under Windows-Updates. If it is showing up, your motherboard is compatible. So, download and install windows 11 easily.
Below are the main System Requirements to install Windows 11.
- At least One GHz or faster processor
- At least 4 GB of RAM
- At least 64GB of storage
- UEFI Secure Boot capability
- Trusted Platform Module (TPM) 2.0 version
If you see a message like "Your PC does not meet minimum system requirements for Windows 11" even though your PC is meeting the above-mentioned requirements, follow the below steps to get eligibility to receive a Windows 11 update entry.
Step 1: Check whether your Windows 10 is on a GPT (GUID Partition Table) partition or not. GPT partition supports UEFI booting. To check, simply open the DISK MANAGEMENT option by right-clicking on the START button. Now choose your bootable or primary partition and right-click. If you see the option "Convert to MBR Disk", it means that the hard disk had been formatted in GPT format only.
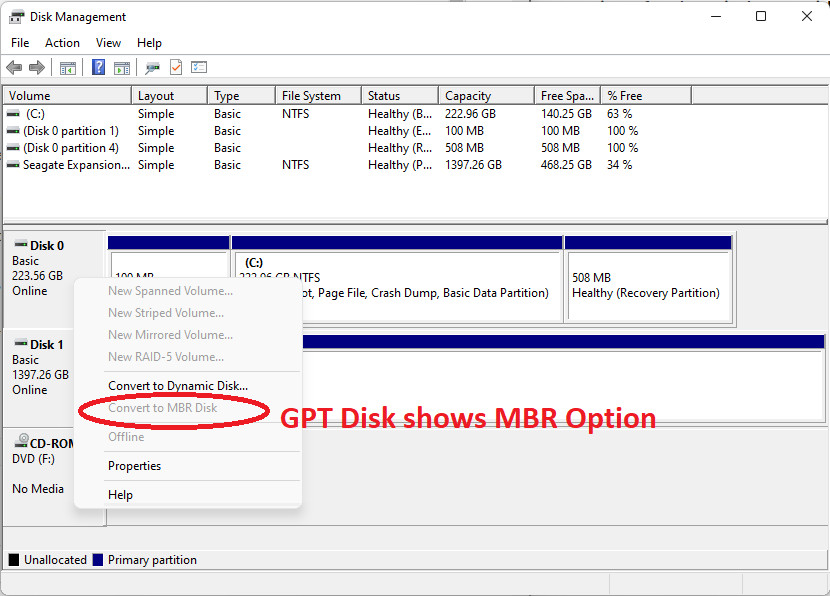
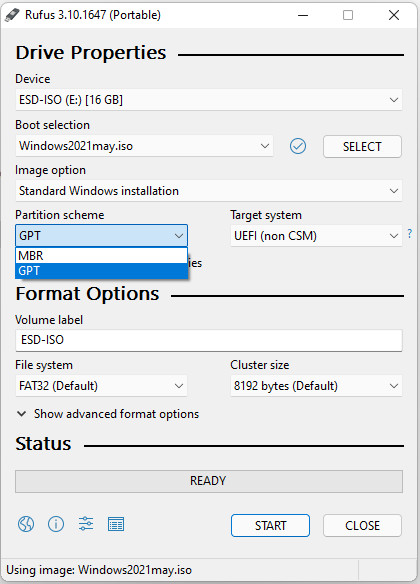
Step 2: If your windows 10 is on an MBR (Master Boot Record) partition, it is advised to format the bootable drive in a GPT style partition and install Windows 10 again. You can use RUFUS software to create a bootable Pendrive. It supports GPT and UEFI formats.
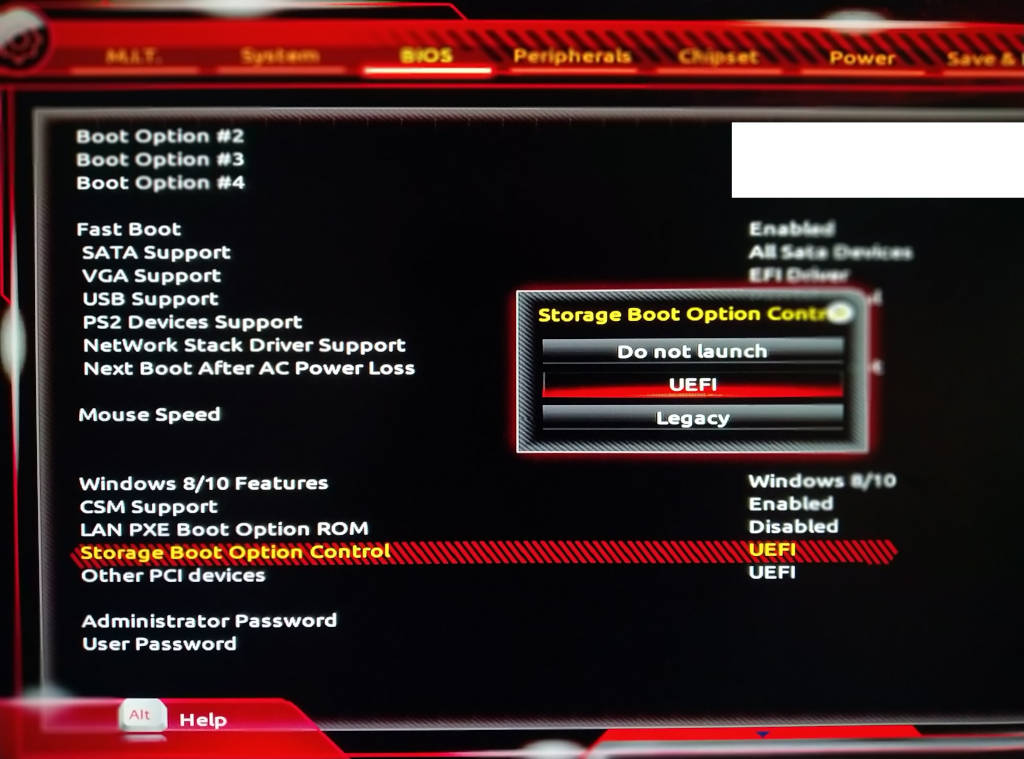
Choose STORAGE BOOT OPTION as UEFI under BIOS settings. Here is a sample setting screenshot of the Gigabyte motherboard below.
Step 3: Now go and check for Windows Updates again. If your PC is satisfying the above system requirements, you will see the option for downloading Windows 11 update. Download and install it.
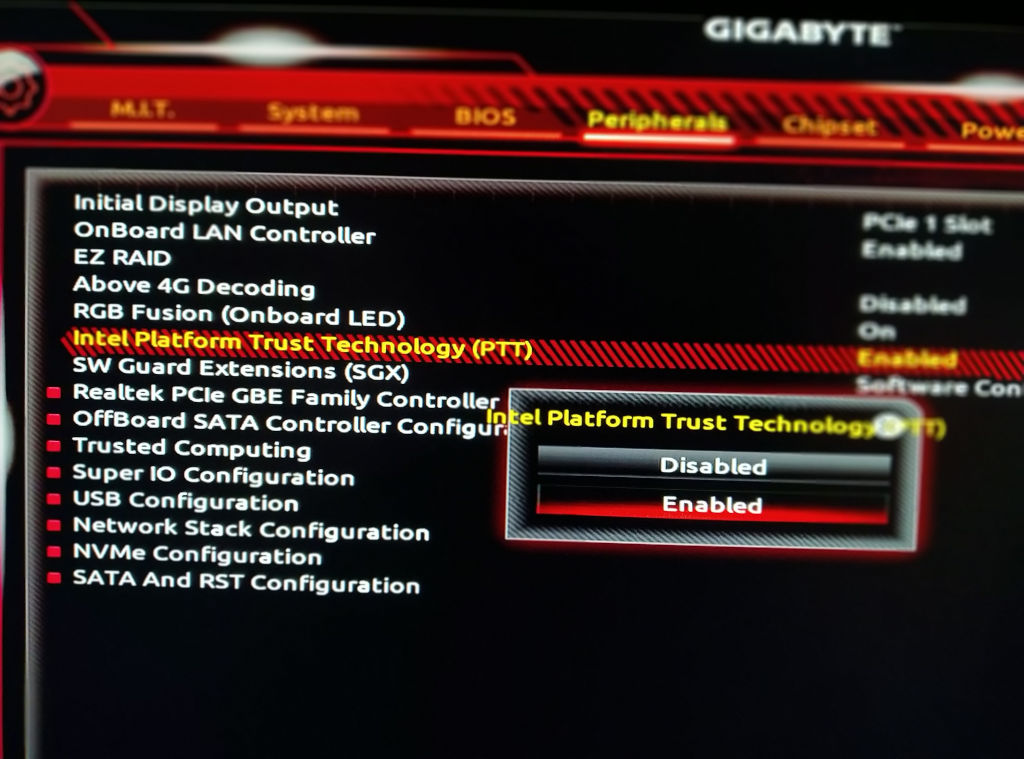
Step 4: If you still do not see Windows 11 option, check your BIOS settings for TPM (Trusted Platform Module) and enable it. Reboot and check for Windows updates again.
Here is a sample screenshot of the Gigabyte Motherboard BIOS settings' Peripheral tab containing Intel Platform Trust Technology PTT Flag. You should enable it.
Step 5: If you still do not see Windows 11 option under Windows Update, it means that your PC configuration does not meet Windows 11 Hardware Requirements. Now you can bypass hardware requirements check using this Script from a Github Project. Download and run this .cmd file using Administrator rights.
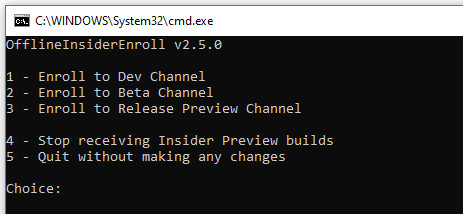
You will see the below options in the command prompt. Choose the second option (2 - Beta) and restart your PC.
- Enroll to Dev Channel
- Enroll to Beta Channel
- Enroll to Release Preview Channel
- Stop Receiving Insider Preview Builds
- Quit without making any changes
Now check for Windows Updates. Complete all pending updates and check again. Finally, you will see an option for downloading and installing Windows 11 on your PC which does not meet hardware requirements. Windows may further check for requirements at the time of installation.
Share this Windows 11 Installation Tutorial with your friends and colleagues to encourage authors.
