
Splash Screen improves look and feel of an Android App. It creates a feeling of Professional Well Built App. Let us create a Splash Screen in Android step by step.
Learn Java basics before diving into Android for fast coding and development.
Create a Splash Screen in Android
Splash Screens are not only useful for appearance but also useful for making Network calls and other Intensive works. Customer happily waits for 3-6 seconds if they see something like a splash screen and a Progressbar if possible.
Create a SplashActivity and a MainActivity at first.
Splash Activity is like any other activity with auto closure after predefined timeout seconds.
We have added a delay of 3000 milliseconds or 3 seconds after which SplashActivity closes automatically and starts MainActivity. Make it just 2 seconds for fast opening of the app.
SplashActivity.java
package com.offlinetutorials.splashapplication;

import android.content.Intent;
import android.os.Handler;
import android.support.v7.app.AppCompatActivity;
import android.os.Bundle;

public class SplashActivity extends AppCompatActivity {

    static int TIMEOUT_MILLIS = 3000;
    @Override
    protected void onCreate(Bundle savedInstanceState) {
        super.onCreate(savedInstanceState);
        setContentView(R.layout.activity_splash);

        new Handler().postDelayed(new Runnable() {

            @Override
            public void run() {

                Intent i = new Intent(SplashActivity.this, MainActivity.class);
                startActivity(i);

                // close this activity
                finish();
            }
        }, TIMEOUT_MILLIS);
    }
}
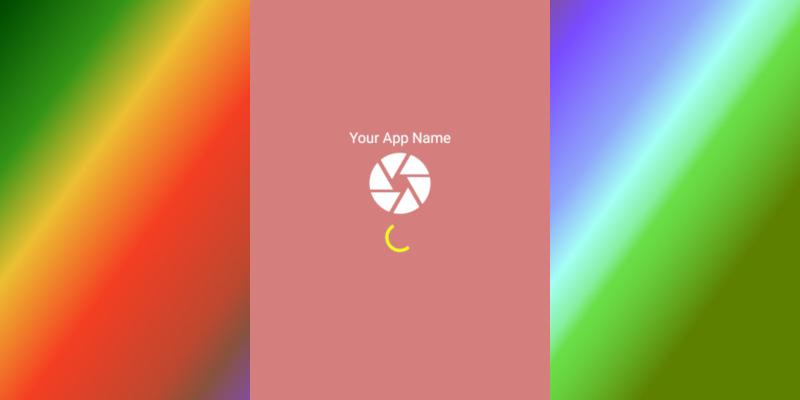
Notice here in activity_splash.xml that we have used an Intermittent Progressbar which gives a fancy look to our Android Splash Screen. Nicest thing here is android:inderminateTint with a custom yellow color. We have changed this Tint color to suit FrameLayout background color. We have taken a Drawable resource as an Image. Drawable images expand without any pixelation.
activity_splash.xml
<?xml version="1.0" encoding="utf-8"?>
<FrameLayout xmlns:android="http://schemas.android.com/apk/res/android"
    xmlns:app="http://schemas.android.com/apk/res-auto"
    xmlns:tools="http://schemas.android.com/tools"
    android:layout_width="match_parent"
    android:layout_height="match_parent"
    tools:context=".SplashActivity"
    android:background="#d47e7e">

    <LinearLayout
        android:layout_width="match_parent"
        android:layout_height="wrap_content"
        android:layout_gravity="center_vertical"
        android:orientation="vertical">
        <TextView
            android:layout_width="match_parent"
            android:layout_height="wrap_content"
            android:text="Your App Name"
            android:textSize="20sp"
            android:textColor="#FFF"
            android:textAlignment="center"/>
        <ImageView
            android:layout_width="100dp"
            android:layout_height="100dp"
            android:layout_gravity="center_horizontal"
            android:src="@drawable/ic_camera_white_24dp"/>
        <ProgressBar
            android:layout_width="wrap_content"
            android:layout_height="wrap_content"
            android:layout_gravity="center_horizontal"
            android:indeterminateTint="#FF0"
            android:indeterminate="true"/>

    </LinearLayout>

</FrameLayout>
Now Make your SplashActivity as a Launcher Activity by specifying in Android Manifest File. Also, note that .MainActivity does not have any intent-filter with MAIN and LAUNCHER tags. Android Theme is set to NoActionBar to hide the top bar with title and menu items.
AndroidManifest.xml
<?xml version="1.0" encoding="utf-8"?>
<manifest xmlns:android="http://schemas.android.com/apk/res/android"
    package="com.offlinetutorials.splashapplication">

    <application
        android:allowBackup="true"
        android:icon="@mipmap/ic_launcher"
        android:label="@string/app_name"
        android:roundIcon="@mipmap/ic_launcher_round"
        android:supportsRtl="true"
        android:theme="@style/AppTheme">
        <activity
            android:name=".MainActivity"
            android:label="MainActivity"
            android:theme="@style/AppTheme.NoActionBar">

        </activity>
        <activity android:name=".SplashActivity"
                    android:label="SplashActivity"
                    android:theme="@style/AppTheme.NoActionBar">
            <intent-filter>
                <action android:name="android.intent.action.MAIN" />

                <category android:name="android.intent.category.LAUNCHER" />
            </intent-filter>
        </activity>
    </application>

</manifest>
This is how we have created a Splash Screen Activity in Android. There are variations in the approach. This approach of showing a Splash Screen is chosen as it does not add extra code and overhead in MainActivity.
Thank you for reading.
| SNO | Topic |
|---|---|
| 1 | Android GridLayout with Equal Width Columns |
| 2 | Android Toolbar Title Change Programmatically |
| 3 | Android Exception - Action Bar already supplied by Window Decor |
| 4 | Android Toolbar Back Button Color & Shape Change |
| 5 | Android Splash Screen Tutorial |